

How To Wrap A Welcome Mat
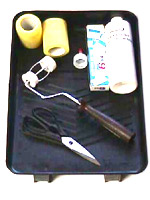
WRAPPING MATS – Materials needed: Fabric, mat, FABRIMOUNT, foam-type paint roller, precipitous razor blades, cutting surface (scrap matboard works best), and a slice of cardboard or heavy newspaper larger than the mat.
 Begin by cutting the mat in the normal manner. A regular bevel works all-time. If a fillet is to exist used, a contrary bevel is recommended. Please note that all fabrics,including Framing Fabrics fabrics, are guaranteed to have imperfections. For this reason nosotros recommend that y'all place the mat nether the material to select the section of cloth you want to utilize. At this point, it is important to make sure the grain of the fabric is straight. This done, trim the fabric to well-nigh 1 inch from the outside border of the mat and set up the textile aside. Place the mat on cardboard or heavy paper and you are ready to get-go using the FABRIMOUNT.
Pour an acceptable amount of FABRIMOUNT into a pigment tray. FABRIMOUNT is similar in viscosity to pancake batter, so it is possible to just pour it onto a piece of scrap matboard if yous don't take a clean pigment tray bachelor. Pour enough adhesive to complete your project without having to cease and cascade more than. Recollect,time is critical because this is an air-dry out adhesive. The formulation is perfect as is, and so please Do Not DILUTE! (Diluting will reduce the adhesive quality and increase the potential for warpage.)
"Load" the roller with agglutinative, removing any backlog as y'all would if y'all were painting. Utilise a compatible coat to the mat, making sure to include the bevel and the corners. Have the time to remove any runs or concentrations of agglutinative that might drain through the cloth. This is easy to practice if you are using the correct tool: a foam-type paint roller. As shortly as you take a compatible glaze, remove the mat from the paper-thin or paper and identify it on a clean cut surface. You now have about ii minutes to accomplish the following.
Immediately place the textile on the mat (Run into Effigy i). It will non adhere until you apply pressure. This is the time to orient the material; brand sure the grain is
direct, and and then on. Once you lot are satisfied that this is so, begin to apply pressure with the tips of the fingers. The sooner you start to utilize pressure (the fresher the adhesive is), the amend it will penetrate the fibers of the material. And this is what determines the effectiveness of the bond. Outset past locating the bevel and the corners, so massage the face of the mat, gradually increasing pressure as the seconds tick past. Continue to do and then for 2 or two-and-a-half minutes to ensure a firm bond. To remove the excess fabric, turn the mat confront downwards on your cutting surface. Using a sharp razor blade, and using the outside edge of the mat as a guide, cut away the backlog fabric (See Figure 2). Next, cut the window out of the fabric, leaving nearly one inch of fabric to wrap around the window of the mat (Figure 3).
The next step is to cut the material diagonally at each corner (Figure four), taking the precaution not to cut across the
bevel of the mat. If you cut too far, the bevel of the mat volition be exposed when you wrap the window. This is a common fault among beginners, and it is a mistake that can exist very easily avoided past taking the above precaution.
Finally, using the roller, apply a one-inch band of agglutinative around the dorsum of the window of the mat (Figure five). Begin the wrapping process by starting in the middle of each side and working your way toward the corners (Figure 6). Wrap one or 2 inches at a fourth dimension, making sure the fabric is wrapped smoothly all along the bevel. When wrapping, it is never necessary to force, stretch, or pull the material. Simply place the fabric where you lot want it and press it down with your hands, gently at first, gradually increasing the pressure as the adhesive dries.
Finish by carefully paying extra attending to the corners. It is a good idea to add together a niggling adhesive to the back of each corner to guarantee a proficient bond and to eliminate the possibility of fraying.
From the time you pour the FABRIMOUNT, you can expect to spend approximately eight to 10 minutes wrapping and trimming a mat.
Problem-SHOOTING – FABRIMOUNT is a very user-friendly agglutinative, so it's difficult to use it wrong. If, still, y'all should experience "bleed-through", the chances are that you will be able to save the project if y'all simply get out it alone and let it dry. Most of the fourth dimension, you volition non be able to encounter it considering information technology dries clear. If you tin can see information technology, you will probably exist able to pare it off. Trying to make clean information technology while it is fresh volition simply result in grinding information technology into the material, making it incommunicable to remove.
Another potential problem is "air bubbling", or a loosening of the cloth. This condition usually results when there is no adhesion. The lack of adhesion is caused by a) an bereft amount of adhesive, b) the adhesive dried before whatsoever pressure was applied, or c) you didn't use FABRIMOUNT.
Source: https://framingfabrics.nnigroup.com/how-to-hand-wrap-fabric-mats/
0 Response to "How To Wrap A Welcome Mat"
Post a Comment